
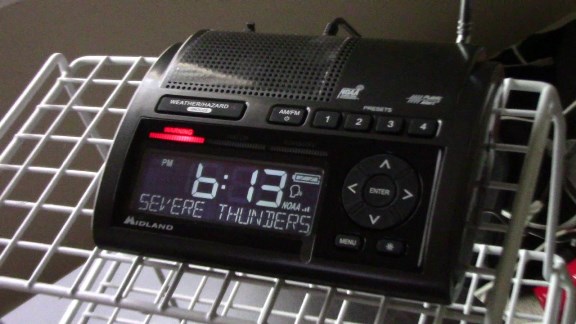
A weather radio can potentially save your life by alerting you ahead of time before severe weather strikes. They will also keep you safe and informed by relaying the latest information from the authorities during a severe weather event. So it's important to not only choose a reliable weather radio but to program it correctly. In this article, we will show you how to set up and program our top-rated weather radio the Midland WR400.
How to Program a Midland WR400 Emergency Alert Weather Radio
One of the reasons why we recommend the Midland WR400 is because it's straightforward to set up. Unlike many radios, you don’t need to know or program in a SAME county code. You only need to select your state and county during the setup process (there is still the option to manually enter SAME codes if you prefer). We’ve provided a video version of the instructions as well as typed them out for you below.
Before you begin, first install 4 AA batteries into the battery compartment on the bottom of the receiver. Then connect the AC adapter and plug your radio into a wall outlet. Ensure the radio is receiving power.
If you are using the radio for the first time, the menu will appear automatically. If the radio was previously programmed, press the “MENU” button to enter the menu. Use the up and down arrows to scroll through the menu, and press “ENTER” to change the settings. We will assume that your radio has not been programmed already in the directions below.
Here are the quick start instructions to set up your Midland weather radio. For more help please refer to the instruction manual.
Set the Language
1. “SELECT LANGUAGE” should appear on your display. Select a language by pressing “ENTER,” then using the up and down arrows to find your language. Press “ENTER” to select the language, and proceed to set up your location.
Set Your Location
1. “01 EMPTY” should appear on your display. Select your location by pressing “ENTER,” and then use the up or down arrows to switch to “SINGLE.” When this appears, press “ENTER” again to set.
We recommend using the “SINGLE” location when programming your radio (instructions you see below are for this method). Only use the “MULTIPLE” and “ALL” options if receiving alerts for a wider area is relevant. For example, the “MULTIPLE” feature might be useful if you live close to a county border. Programming your radio for the next adjacent county will give you advance notice of incoming severe weather. If you’re an emergency manager or first responder, using “ALL” is wise.
2. Use the up and down arrows to select your country, then press “ENTER.”
3. Now use the up and down arrows to select your state, then press “ENTER.”
4. Finally, use the up and down arrows to select your county, then press “ENTER.” Now the receiver will take you to the time setup.
Set Your Time
1. “SET TIME” should appear on your display. Start time setup by pressing “ENTER.”
2. “SETTING HOUR” should appear, use the up and down arrows to set. When complete, press the right arrow. Do not press “ENTER” or the radio will exit out of the time setup.
3. “SETTING MINUTES” should appear, use the up and down arrows to set. When finished, press “ENTER.”
Set Channel and Test
1. “SET CHANNEL” should appear on your display. Ensure the antenna is fully extended. Use the up and down arrows to select your local frequency, using this list of nationwide broadcast frequencies as a guide. Select the appropriate station and press “ENTER.”
2. Your weather radio is now set up and ready to use. Press “WEATHER/HAZARD” to confirm the appropriate station is selected, and use the volume wheel on the right side of the radio to adjust the volume to a reasonable level.
Features to Look for When Buying a Weather Radio
If you have not purchased a weather radio already, please consider these important features that all high-quality emergency weather radios should include.
Public Alert Certified
After reviewing the best weather radios on the market, our number one recommendation is the Midland WR400. The WR400 not only works as a weather alert radio but also doubles as an alarm clock with AM/FM radio. The WR400 is Public Alert certified, which means it meets specific technical standards developed by the Consumer Electronics Association in conjunction with the National Weather Service. Weather radios that display the Public Alert logo include the features listed below.
SAME Technology
SAME stands for Specific Area Message Encoding. It was introduced to allow weather radios to sound alerts only for your local county or the area you choose to monitor. Early weather radios did not have this feature and alerted to every watch or warning (hurricane, tornado, flooding, etc.) for the weather radio station’s broadcast area. SAME technology minimizes the risk of any “false alarms” from events that are a few counties away from where you live.
Battery Backup
Public Alert certified radios must be able to operate with a battery backup power supply. A receiver with backup batteries allows you to continue to receive alerts if the power is out, which can often occur during storms.
External Antennas
While the weather radio network is expansive and covers well over 90 percent of the U.S., in some areas—even in some suburban and urban areas—the signal may be weak. A reasonably strong signal is required to receive alerts reliably, so most weather radios (including the Midland WR400) allow for the connection of an external antenna to boost reception.
External Notification Devices
While not required on consumer Public Alert radios, the Midland WR400 includes an external notification jack. This feature allows those that may be hard of hearing or deaf to receive critical weather alerts through external notification devices, such as a strobe light, bed shaker, or even a larger siren.
Important Information
Ensure your radio has adequate reception by checking in for the weekly tests, which occur on Wednesdays between 11 am and noon local time when severe weather is not present. If your weather radio does not receive any of the test messages or actual alerts for more than ten days, a “CHECK WEATHER RECEPTION” message will appear on the display. If this happens, check your channel settings and county settings for any errors. If you have trouble finding reception, try moving your radio closer to a window or invest in an external antenna.
It's also important to periodically check the battery levels and the condition of the batteries to ensure proper operation if the power does happen to cut out during a storm. The Midland WR400 includes a battery level indicator on the top right corner of the display for your reference. We also recommend reading through the instruction manual to learn more about your weather radio. The WR400 has a lot of useful features that we haven’t mentioned here, including the ability to customize the alerts to your specific needs.
If you have any questions or are having trouble, please let us know, and we’ll be glad to help you out.